This tutorial is all about Display Image Using Java File Chooser. This tutorial will teach you on how to load a selected image using Java file chooser and display it to a Java label element. This program will use HeadlessException, Image, ByteArrayOutputStream, File, FileInputStream, IOException, ImageIcon, JFileChooser, and JOptionPane libraries. The following libraries are already bundles with Netbeans 8.0.2 and you don’t need to download it again from the internet.
Display Image Using Java File Chooser Steps
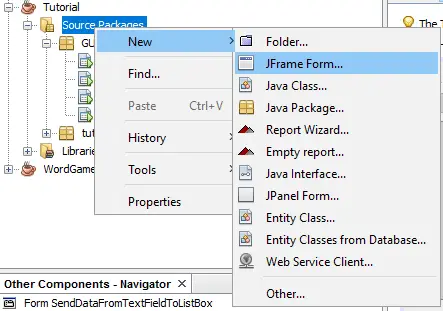
- Add a new JFrame form inside your source package.
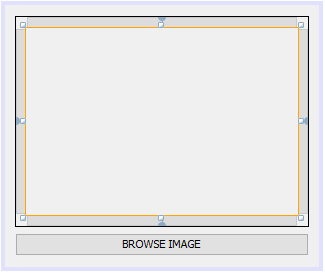
2. Design your form just like the image below. The form uses jPanel, jLabel, and jButton elements located in our tool pallet.
3. Add the following codes above your main class. The following codes will access the required libraries for the program.
[java]import java.awt.HeadlessException;
import java.awt.Image;
import java.io.ByteArrayOutputStream;
import java.io.File;
import java.io.FileInputStream;
import java.io.IOException;
import javax.swing.ImageIcon;
import javax.swing.JFileChooser;
import javax.swing.JOptionPane;[/java]
4. Add the following codes inside your main class. The following codes are the variable declaration use in the program. person_image is a variable with byte data type, path and filename are variables with string data types.
[java]byte[] person_image = null;
String path;
String filename = null;[/java]
5. Double click your browse button and insert the following codes below.
[java]try {
JFileChooser chooser = new JFileChooser();
chooser.showOpenDialog(null);
File f = chooser.getSelectedFile();
path = f + “”;
filename = f.getAbsolutePath();
ImageIcon imgThisImg = new ImageIcon(new ImageIcon(filename)
.getImage().getScaledInstance(280, 187, Image.SCALE_DEFAULT));
jLabel1.setIcon(imgThisImg);
File image = new File(filename);
FileInputStream fis = new FileInputStream(image);
ByteArrayOutputStream bos = new ByteArrayOutputStream();
byte[] buf = new byte[1024];
for (int readNum; (readNum = fis.read(buf)) != -1;) {
bos.write(buf, 0, readNum);
}
person_image = bos.toByteArray();
} catch (HeadlessException | IOException e) {
JOptionPane.showMessageDialog(null, e, “Error”, JOptionPane.ERROR_MESSAGE);
}[/java]
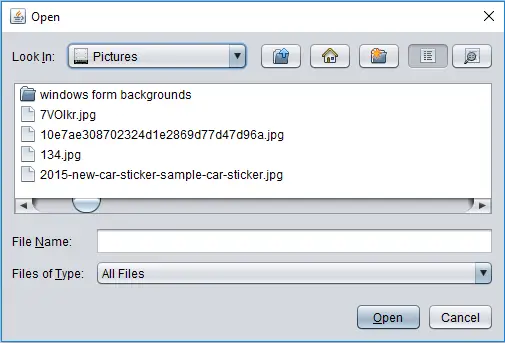
6. Run your program and the output should look like the image below. After the user click the browse button, the Java File Chooser dialog appear and you need to browse and select a specific image/picture to load in Java label.

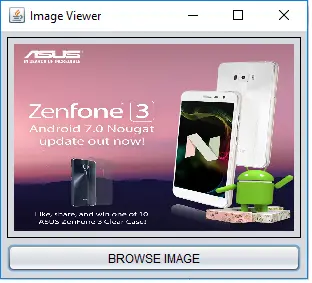
There are two executions happen from the source code above, the loading of image into Java label and the conversion of image path into byte.
When the users select an image using java file chooser, the selected image will directly display into java label and also converted the image path into byte. We will use the output byte when we save or insert the image into MySQL database.
After completing this tutorial, you are now learned and understand on how to load a specific image or picture into java label and also converting the image into byte.
About The Display Image In Java
| Project Name: | Display Image |
| Language/s Used: | JAVA |
| Database: | None |
| Type: | Desktop Application |
| Developer: | IT SOURCECODE |
| Updates: | 0 |
Related Articles You May Like: